Shower Screen Replacement Steps: A Guide for Café Operators
For every café operator, espresso consistency depends not only on bean quality or grinder calibration—but also on regular machine maintenance. Among the most critical yet easily overlooked components is the espresso shower screen, the small metal plate that ensures even water distribution across the coffee puck.
Over time, coffee oils, fine grounds, and limescale accumulate on the screen’s surface and inside its micro-holes. This buildup restricts water flow, causes uneven extraction, and alters flavor quality. Routine shower screen replacement is therefore essential for maintaining both brew quality and equipment longevity.
At Caffepress Precision Technology Co., Ltd., we manufacture precision-etched stainless-steel shower screens designed for easy installation and long-term reliability. The following guide explains step-by-step replacement procedures, practical tips, and preventive maintenance practices for café professionals.
Understanding the Role of the Shower Screen
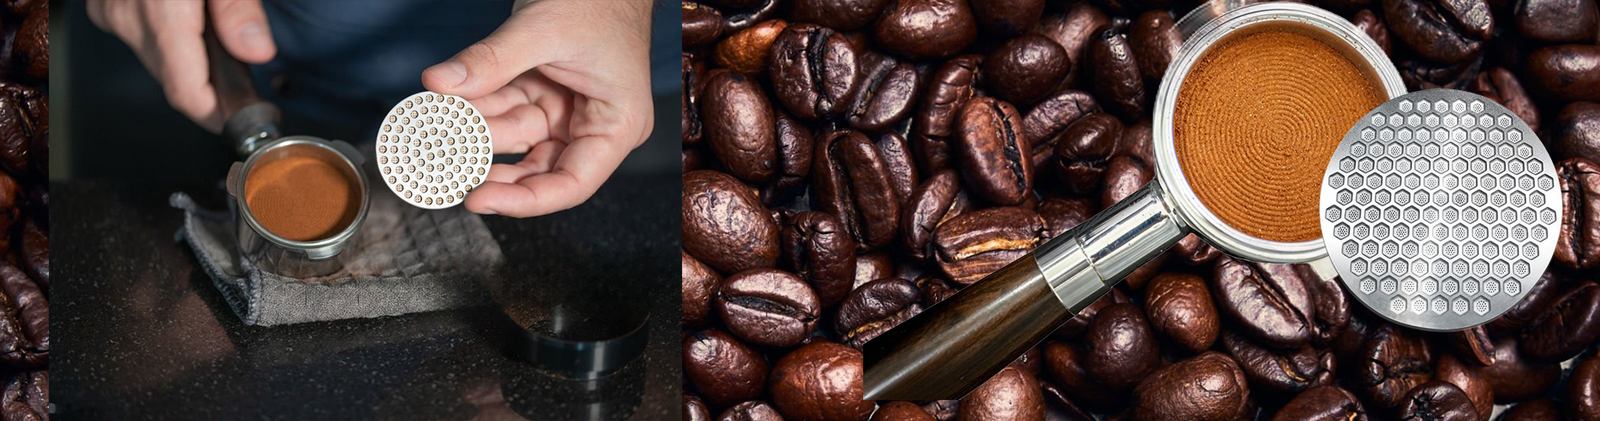
Before replacing it, it’s important to know what the part does. The shower screen sits directly under the espresso machine’s group head, dispersing pressurized water evenly onto the coffee puck. Its structure—hundreds of microscopic holes—ensures balanced flow and consistent saturation.
When clogged or warped, however, water distribution becomes irregular. You may notice symptoms like:
-
Spraying or uneven espresso flow
-
Bitter or sour taste variations between shots
-
Channeling and thin crema
-
Excessive buildup even after backflushing
If these occur, it’s time for replacement rather than another cleaning cycle.
When Should You Replace a Shower Screen?
Most cafés benefit from replacing their shower screens every 3–6 months, depending on:
-
Shot volume: High-output cafés should replace more frequently.
-
Water hardness: Hard water accelerates scale buildup.
-
Cleaning habits: Regular backflushing extends life but doesn’t eliminate embedded residue.
-
Material: Etched stainless steel (such as Caffepress 316 SS screens) lasts longer than punched brass alternatives.
A clear rule of thumb: when cleaning no longer restores full flow, replace immediately to prevent inconsistent extractions.
Tools and Materials You’ll Need
Before starting, gather the following items:
-
Flat-head screwdriver or Allen key (depending on your group head design)
-
Clean microfiber cloth
-
Food-grade lubricant (for gasket installation)
-
Replacement shower screen and group-head gasket (if needed)
-
Small brush or coffee cleaning tool
-
Hot water or descaling solution
Having everything ready reduces downtime and avoids losing small components.
Step-by-Step Guide to Shower Screen Replacement
Step 1 – Power Off and Cool Down
Turn off the espresso machine and allow it to cool for at least 20–30 minutes. This prevents burns and protects gaskets from heat damage during removal.
Step 2 – Remove Portafilter and Access the Screen
Detach the portafilter. Look up into the group head—you’ll see the shower screen secured by a central screw or clip.
Use the appropriate screwdriver or Allen key to loosen the screw. Hold your other hand underneath so the screen and screw don’t fall into the drip tray.
Step 3 – Remove the Old Screen and Gasket
Carefully lower the shower screen and the rubber group-head gasket (if it comes out together). Inspect both parts for cracks, warping, or heavy buildup.
If you see blackened residue or deformed edges, replacement is mandatory.
Step 4 – Clean the Group Head
Wipe away all coffee oils and scale residue using a microfiber cloth. For stubborn deposits, use a small brush dipped in hot water or a descaling solution.
This cleaning step is crucial—installing a new screen on a dirty surface prevents proper sealing and heat transfer.
Step 5 – Install the New Shower Screen
Position the new Caffepress precision-etched screen under the group head with its smooth side facing outward. Align the screw hole carefully.
If your design includes a separate gasket, apply a thin layer of food-grade lubricant to help seat it evenly. Then insert the screw or clip and tighten gently but firmly—avoid overtightening, which can warp the metal or damage the thread.
Step 6 – Test for Fit and Flow
Reattach the portafilter and run a short water flush cycle (without coffee). Check that water disperses evenly across the basket. No side spray or pulsation should appear.
If the flow is irregular, stop and re-align the screen or gasket.
Step 7 – Resume Operation
Once confirmed, run a few blank shots to ensure proper heat transfer and stability. Your machine is now ready for service.
Maintenance Tips for Longer Screen Life
-
Backflush daily with a coffee cleaning detergent to prevent oil buildup.
-
Wipe the screen surface with a damp cloth between shifts.
-
Use filtered or softened water to reduce mineral deposits.
-
Avoid metal brushes—they can scratch or deform the etched surface.
-
Inspect monthly for clogging or discoloration.
High-precision etched screens like those from Caffepress can maintain optimal performance for thousands of extractions when properly cared for.
Why Choose a Chemically-Etched Caffepress Shower Screen
| Feature | Caffepress Etched Screen | Conventional Punched Screen |
|---|---|---|
| Hole Accuracy | ±0.01 mm | ±0.05 mm or more |
| Surface Finish | Burr-free, smooth | Rough edges, possible distortion |
| Thermal Conductivity | Consistent (304 / 316 SS) | Variable |
| Cleaning Ease | High | Moderate |
| Branding Options | Custom laser logo | Limited |
Our etching process ensures uniform water flow, superior cleanliness, and reliable sealing against the group head. All screens are manufactured from food-grade 304 or 316 stainless steel, compliant with ISO 9001 and SGS standards, making them ideal for global café chains and equipment distributors.
Common Mistakes to Avoid
-
Skipping the gasket check – A worn gasket can leak even with a new screen.
-
Over-tightening – Warps the metal and reduces lifespan.
-
Installing upside-down – Always keep the etched side facing the puck.
-
Using abrasive tools – Damages micro-holes and affects dispersion.
-
Ignoring alignment – Misalignment creates uneven pressure and premature wear.
Attention to these small details prevents expensive repairs and keeps extraction consistent across shifts.
Troubleshooting After Replacement
| Symptom | Likely Cause | Solution |
|---|---|---|
| Water spraying sideways | Misaligned screen or gasket | Re-install and tighten evenly |
| Low pressure or slow flow | Blocked or reversed screen | Remove, clean, reinstall |
| Uneven extraction | Screen not seated flat | Check screw and gasket |
| Leaking from group head | Damaged gasket | Replace gasket |
| Burnt smell | Coffee residue left in group head | Re-clean thoroughly |
Consistent results depend on precision installation and correct orientation every time.
Conclusion – Simple Maintenance, Major Results
Replacing a shower screen takes just a few minutes, but its effect on espresso quality is dramatic. Clean, evenly dispersing water ensures full flavor development, better crema, and consistent extraction shot after shot.
Caffepress makes this process easier with precision-etched, burr-free shower screens engineered for durability, heat stability, and effortless maintenance.
For café owners and equipment importers worldwide, partnering with Caffepress Precision Technology Co., Ltd. means reliable OEM supply, consistent quality, and fast export service from our Dongguan factory.
Upgrade your maintenance routine today—contact Caffepress to order premium replacement shower screens tailored to your espresso machine.
Frequently Asked Questions
1. How often should café operators replace their shower screens?
Typically every 3–6 months, depending on shot volume and water quality.
2. Can I clean instead of replacing the screen?
Yes, but once buildup remains after thorough cleaning, replacement ensures consistent water flow.
3. Should the gasket be replaced together with the screen?
If the gasket feels brittle or compressed, replace it at the same time to maintain a proper seal.
4. What tools are needed for replacement?
A screwdriver or Allen key, microfiber cloth, and the new Caffepress screen are usually sufficient.
5. Are Caffepress screens compatible with all espresso machines?
Caffepress manufactures multiple diameters (51 mm–58 mm) and supports OEM customization for most commercial and home machines.
Readability Check